Exploring data
Radiology and medical imaging
Collections ingested from volumetric medical data (CT, MR, DICOM) get extra viewer controls: scrub through slices, switch reconstruction axis, adjust window/level for tissue contrast, and overlay curated segmentation masks.
Last updated 2026-05-29
These controls appear automatically for collections that carry volumetric / DICOM data; ordinary image collections don’t show them.
Slice navigation
A scrubber sits at the foot of the viewer. Drag it (or use the ‹ › buttons, or Play to auto-advance) to move through the stack — SLICE 122 / 243. The SLICE / CORONAL / SAGITTAL tabs reslice the volume along a different axis.

Window / level
Medical images carry far more intensity range than a screen shows, so you pick the window. The Level / Width sliders set the centre and span of the displayed range; the modality preset dropdown (Default (DICOM), and named tissue presets) jumps to standard windows. Toggling the alt-drag control lets you set window/level by dragging on the image, PACS-style.
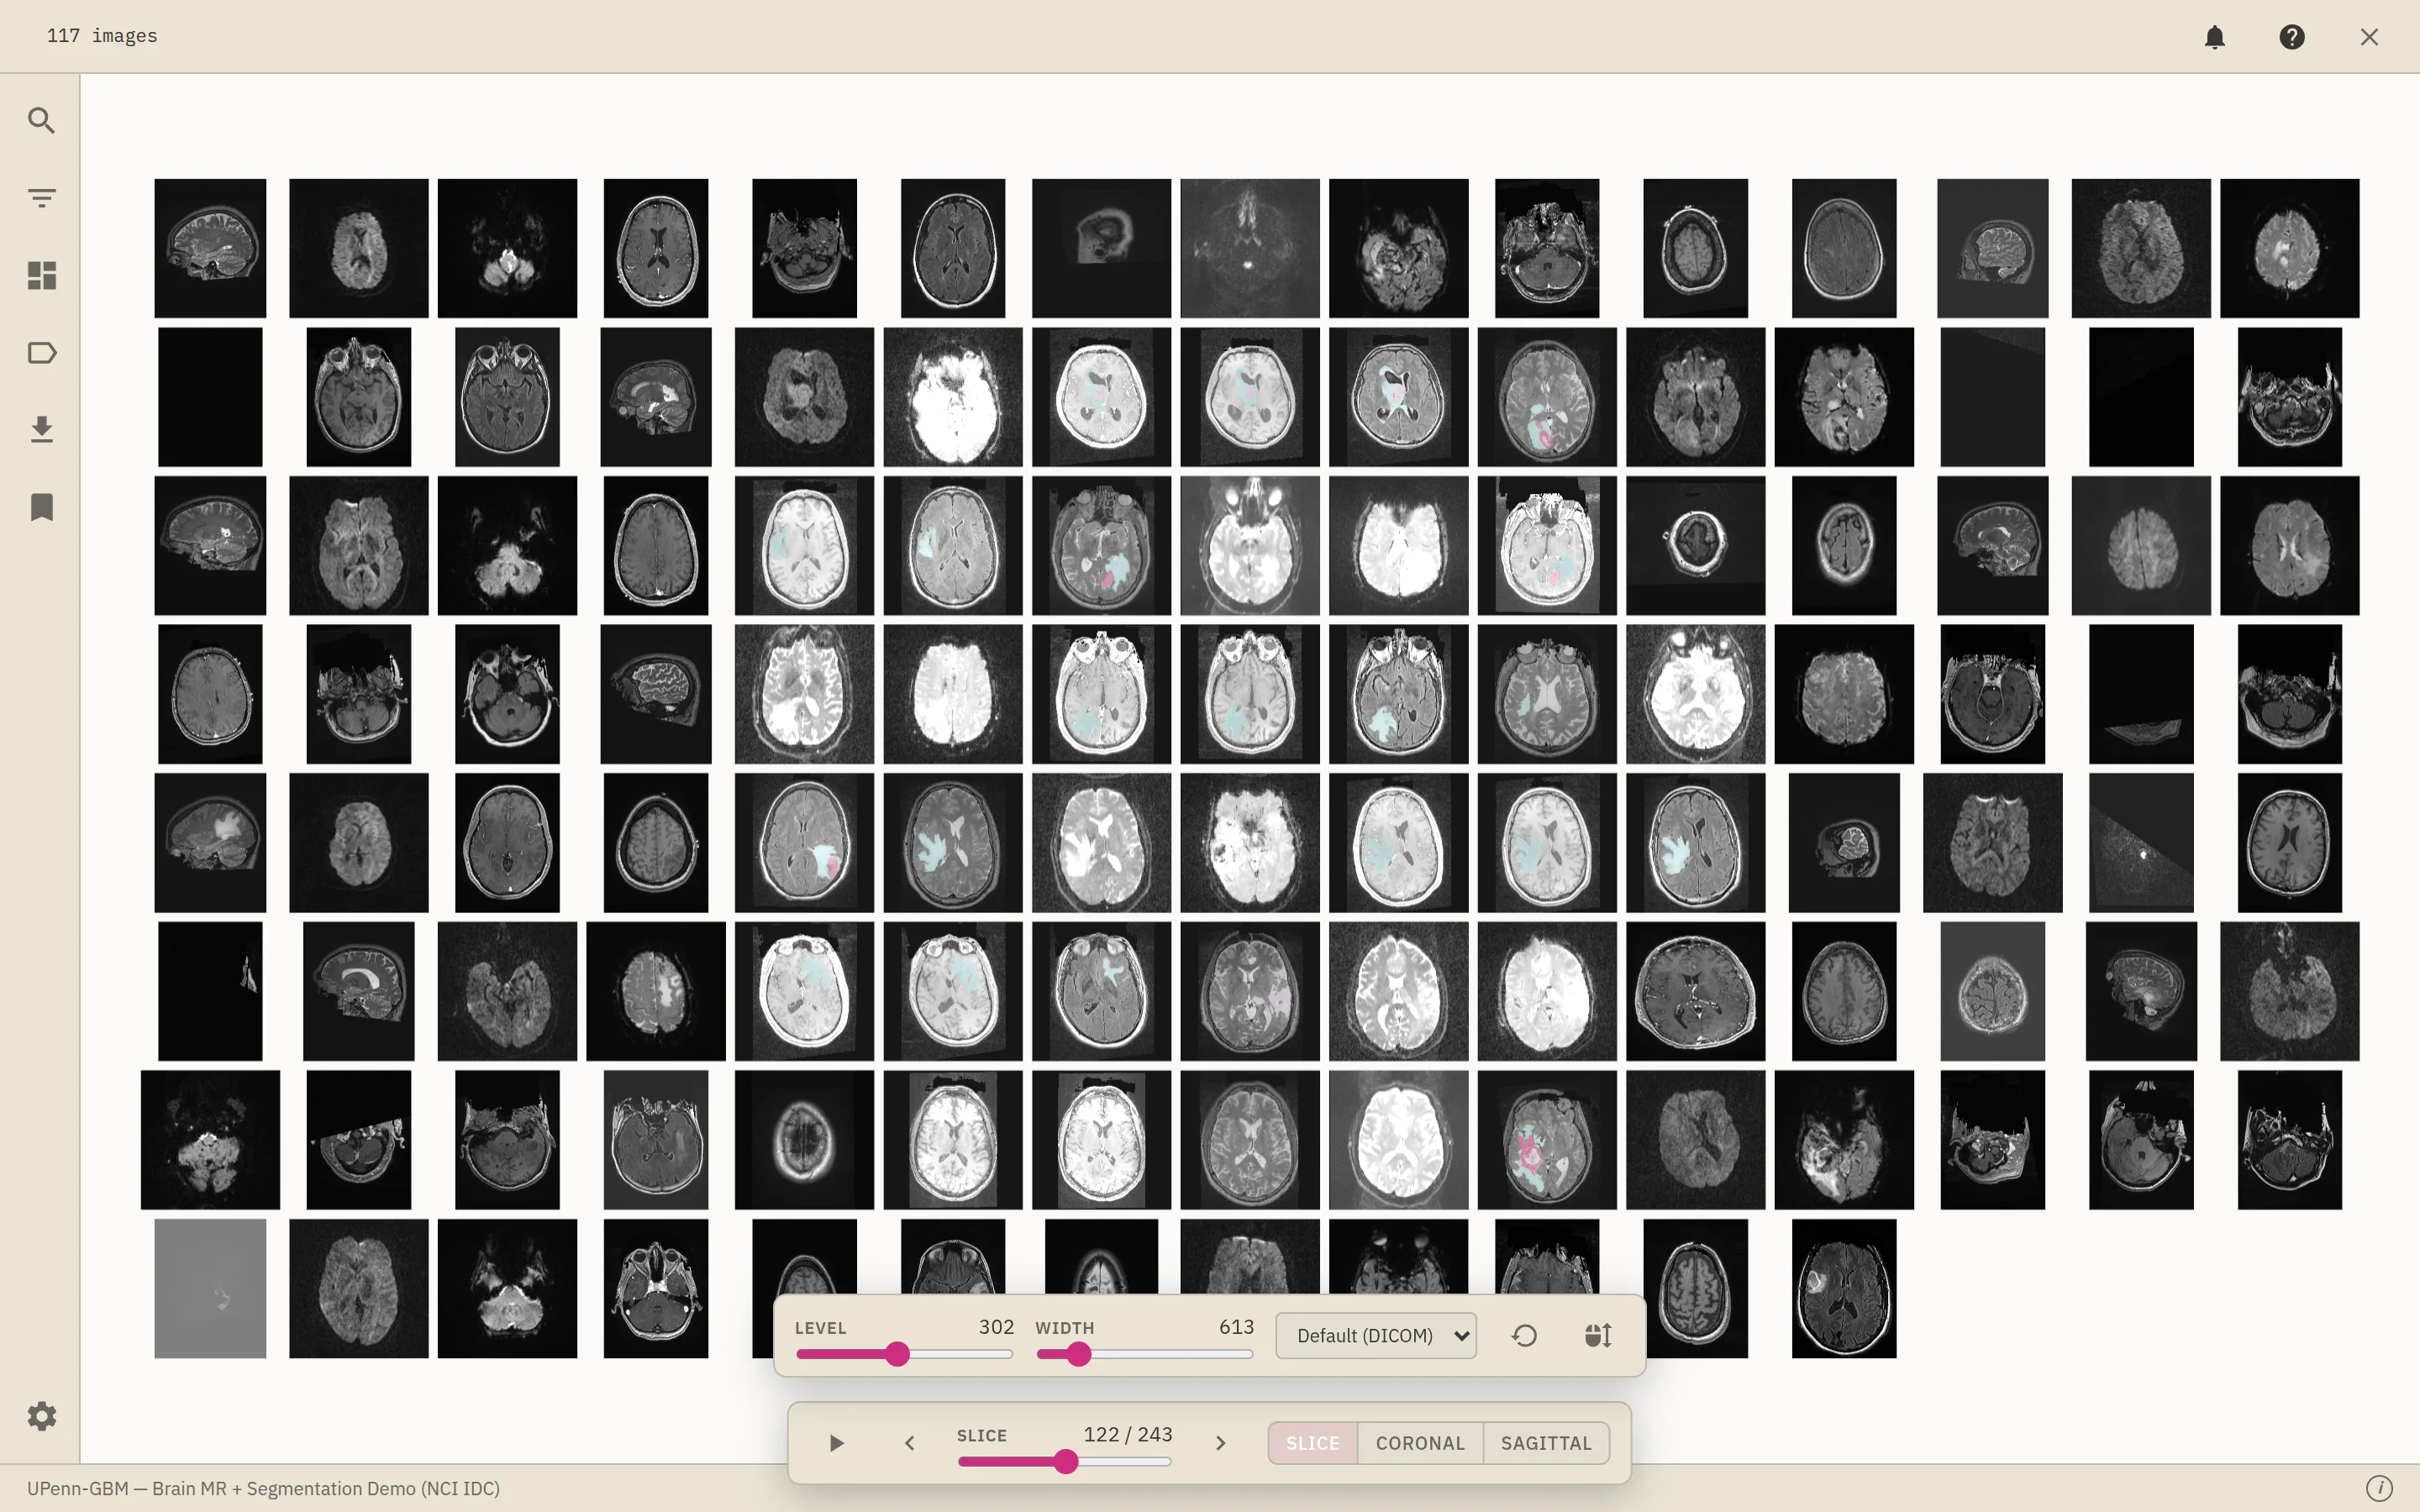
Window/level is applied live by the renderer, so every visible slice updates as you drag. A non-default window is captured in the URL for radiology collections, so a link reproduces what you were looking at.
Segmentation overlays
When a collection was ingested with paired masks, the Inspector’s Annotations tab gains a Segmentation overlay section. It’s read-only and pre-computed, so every viewer sees it — clinicians without write access still get the curated outline.
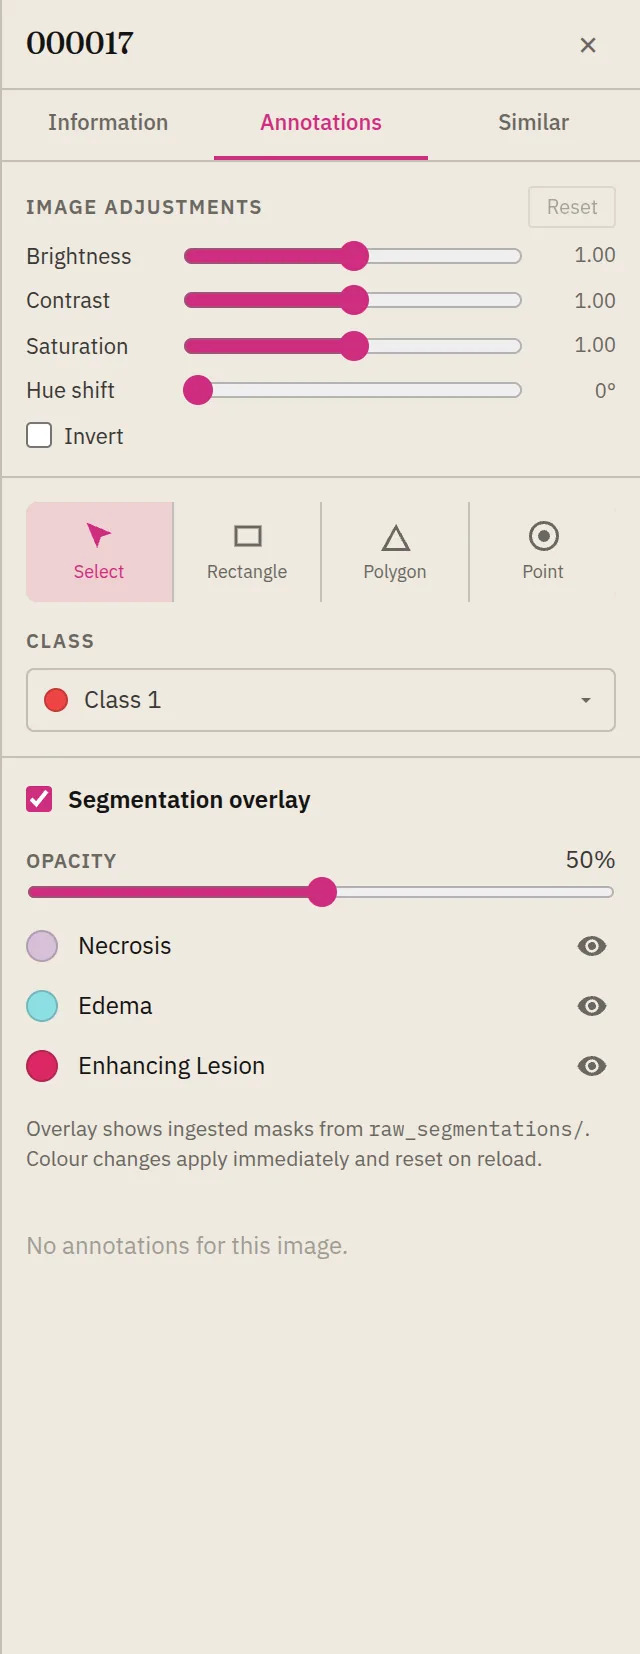
Toggle the overlay on, set its opacity, and show/hide or recolour each labelled class (here Necrosis, Edema, Enhancing Lesion). Colour changes apply immediately and reset on reload.
Image adjustments
The same Annotations tab carries brightness, contrast, saturation, hue, and invert sliders — handy for teasing out detail before reading or annotating. These are display-only and don’t alter the stored image. See Annotations for the drawing tools alongside them.
See also
- The standard viewer and view types: Viewing collections.
- Drawing and classes: Annotations.
- Importing DICOM / DICOMweb sources: Uploading collections.